IBM MAINFRAME Automation Using PYTHON
Automate Your Regular Jobs Using Python

By Dr. RamGokul M
Around 2016, when I was supporting IBM mainframe application, I wrote a VB Script tool which is used to send commands to the mainframe and receive responses back via the PC 3270 terminal emulator. This tool helped us to automate repetitive keyboard entries by pretending to be an interactive user who extracts and updates information on the mainframe. Even more, we also used it to measure the response time of the mainframe commands in real-time. Basically, a kind of “Mainframe Screen Scraper”.
As I recall, I also wrote an automation script using Rexx, a common scripting language for all IBM environments from mainframe to PC. The tool ran on IBM OS/2 and used EHLLAPI (Emulator High-Level Language Programming Interface) of Communication Manager/2 (CM/2) to communicate with the mainframe.
Fast forward to 2020, a friend called for help to do the same “Mainframe Screen Scraper”. Apparently, his local team is a user of an internal worldwide legacy application and the tool could help to automate the mainframe data extraction process without filling out a request form for the global IT support.
Frankly, after a couple of years, I’m not sure if people are still using this kind of tool. However, a quick search on the Google reveals that current users of the mainframe still indeed use it. It is no longer implemented in VB Script, Rexx and OS/2, of course, but uses current popular languages and platforms, both commercial and open source. After doing some research I decided to implement it using Python, x3270 and py3270. It is free and runs on most of the modern platforms such as Windows, Linux, etc.
Since many of my friends are working in Mainframe Systems I’m sharing this article. This article documents how to write a simple script to login to a mainframe terminal, doing some commands and then log off. You could expand it based on your requirements.
Let’s Start
Python is the basic requirement, you can use Python 2 or Python 3. Python 3 is recommended because Python 2 is sunset. Depending on your OS, you may need to manually install it, or it’s already built-in. Few steps can be very basic for a python developer but I am writing this considering the Mainframe developers who do not have any idea on Python development.
Linux Ubuntu
Ubuntu 18:04 LTS comes with both Python 2 and Python 3 pre-installed. You can verify with the following commands:
$ python –version
Python 2.7.15+
$ python2 –version
Python 2.7.15+
$ python3 –version
Python 3.6.8
$ sudo apt update
$ sudo apt -y upgrade
$ sudo apt install -y x3270 python3-pip
$ pip3 install py3270
Windows 8/10
Windows doesn’t come with Python so you have to install it. The following installation steps assume your Windows is 64-bit:
1. Go to https://www.python.org/downloads/windows/
2. Download the “Windows x86-64 executable installer” for Python 3.7 (the latest stable release as of this writing)
3. Install Python 3.7 and make sure to check “Add Python 3.7 to PATH” while doing so
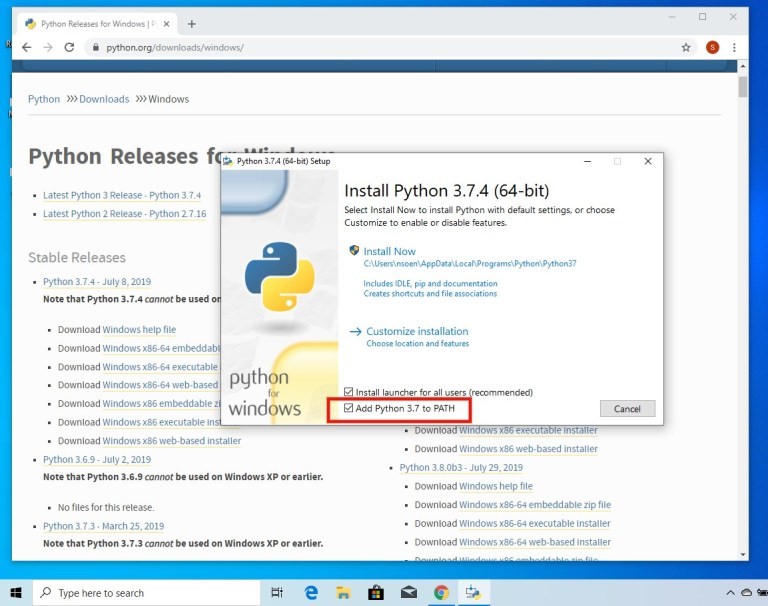
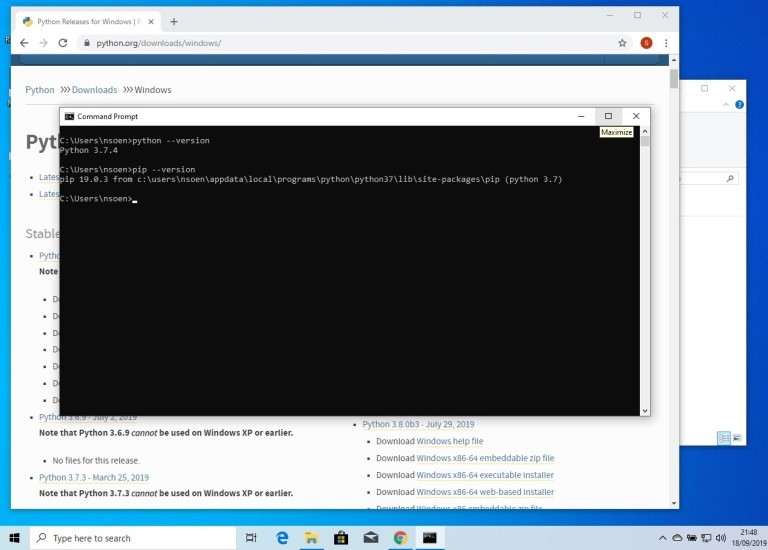
To verify that python and pip are installed, open command prompts and issue these commands:
> python –version
> pip –version
You still need x3270 terminal emulator to run your 3270 screen scraper even though you may already use another terminal emulator such as IBM PCOMM to access your mainframe.
Download wc3270 (x3270 for Windows) from here.
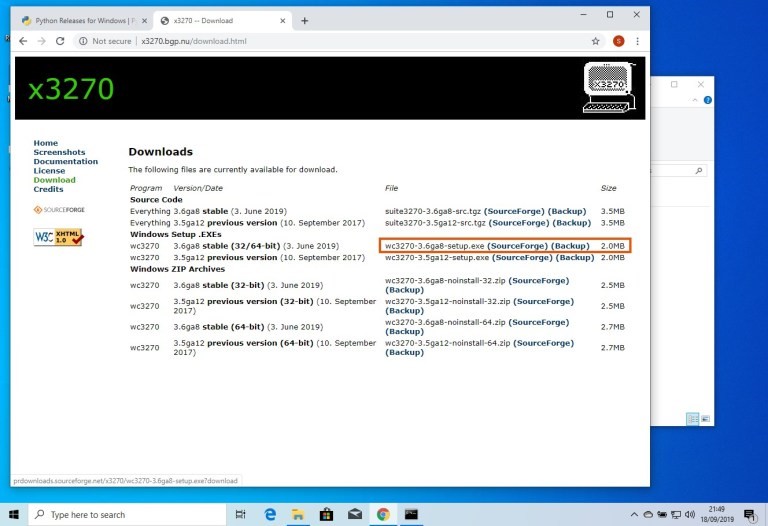
Run the installation EXE.
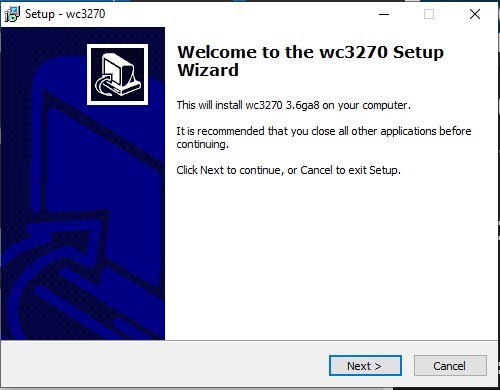
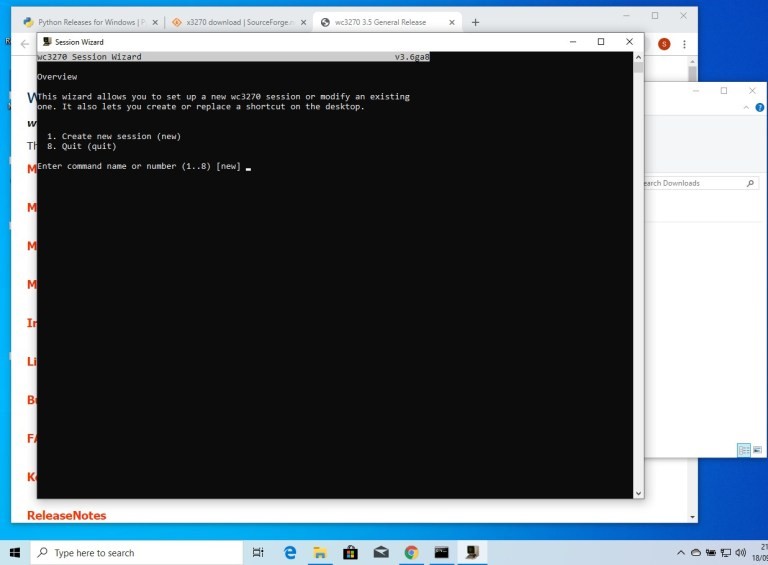
Once the installation completes, you will be asked to create a new wc3270 session. If you also want to use wc3270 to access the mainframe through wc3270 terminal then you need to create one, such as the case that you don’t have another 3270 terminal emulator. However to run your python screen scraper you don’t need to create a wc3270 session.
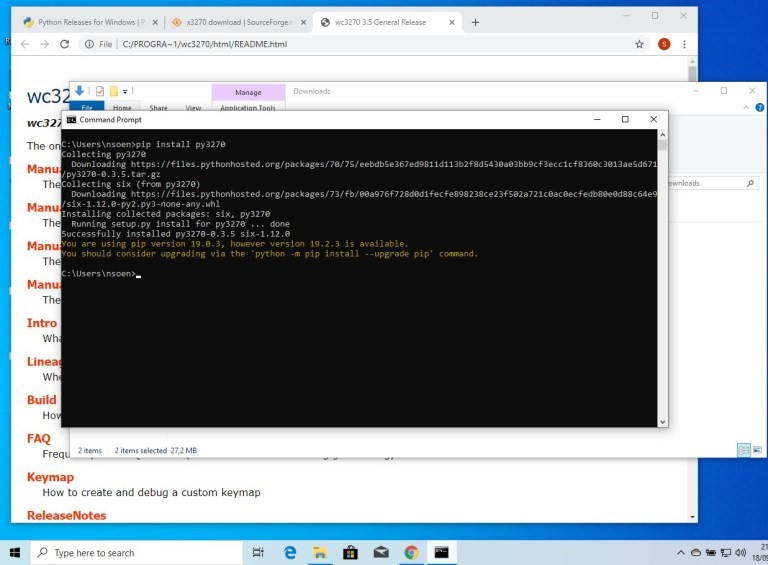
Finally, install the py3270 package.
> pip install py3270
Writing 3270 Screen Scraper
We will now log in to TSO, create a CLIST library, create a “Hello World” clist, execute the clist and log out. In this article, however, those TSO/ISPF commands will be run with AutomateMainframe.py, a sample 3270 screen scraper written in Python. Although MVS 3.8 is very old, the IBM 3270 architecture does not change so that what is shown in this tutorial applies to the latest versions of IBM z /OS and z /VM as well.
I uploaded AutomateMainframe.py to the GitHub, please take a look at the code and the comment. Basically, it follows strictly what you do with the keyboard by calling the associated py3270 library method/function.
First, create an object of Emulator class. If you specify ‘visible=True’ as the argument then it will use x3270 so that you can see what is going on. If you specify ‘visible=False’ or no argument then it will use s3270 and it will run in the background.
Once an Emulator class object is created, the methods in py3270 library can be used to interact with the host.
1. Connect to the host and login to TSO (line 20-48)
2. List dataset (line 51-69)
3. Capture the dataset list and store in screenrows[ ] (line 70-76)
4. Create a clist dataset (line 77-120) unless the dataset already exists
5. Write down ‘hello’ clist (line 121-161)
6. Execute ‘hello’ clist from ISPF TSO command (line 162-179)
7. Exit ISPF and return into TSO (line 180-193)
8. Execute again ‘hello’ clist from TSO (line 197-200)
9. Logoff from TSO, disconnect from host and terminate the 3270 subprocesses (line 201-207)
10. Print out the dataset list information from #3 (line 208-210)
connect(host):
• Description: Connect to a host
• Arguments:
host (string): host name or IP address
terminate():
• Description: terminates the underlying x3270 subprocess. Once called, this Emulator instance must no longer be used.
• Arguments: none
exec_command(cmdstr):
• Description: Execute an x3270 command `cmdstr` gets sent directly to the x3270 subprocess on it’s stdin. Alternatively, there is some frequently used keys ‘shortcut’:
• send_enter() is equivalent to exec_command(b”Enter”)
• send_pf3() is equivalent to exec_command(b”PF(3)”)
• etc.
• Arguments:
cmdstr (string): x3270 command
wait_for_field():
• Description: Wait until the screen is ready, the cursor has been positioned on a modifiable field, and the keyboard is unlocked. Sometimes the server will “unlock” the keyboard but the screen will not yet be ready. In that case, an attempt to read or write to the screen will result in a ‘E’ keyboard status because we tried to read from a screen that is not yet ready. Using this method tells the client to wait until a field is detected and the cursor has been positioned on it.
• Arguments: none
string_get(ypos, xpos, length):
• Description: Get a string of ‘length’ at screen coordinates ‘ypos’/’xpos’. Coordinates are 1 based, as listed in the status area of the terminal.
• Arguments:
ypos (int): y position (row number)
xpos (int): x position (column number)
length (int): length of the string
string_found(ypos, xpos, string):
• Description: Return True if `string` is found at screen coordinates ‘ypos’/’xpos’, False otherwise. Coordinates are 1 based, as listed in the status area of the terminal.
• Arguments:
ypos (int): y position (row number)
xpos (int): x position (column number)
length (int): length of the string
move_to(ypos, xpos):
• Description: move the cursor to the given coordinates. Coordinates are 1 based, as listed in the status area of the terminal.
• Arguments:
ypos (int): y position (row number)
xpos (int): x position (column number)
send_string(tosend, ypos=none, xpos=none):
• Description: Send a string to the screen at the current cursor location or at screen coordinates ‘ypos’/’xpos’ if they are both given. Coordinates are 1 based, as listed in the status area of the terminal.
• Arguments:
tosend (string): string to be sent to the screen
ypos (int): y position (row number)
xpos (int): x position (column number)
fill_field(ypos, xpos, tosend, length):
• Description: Clears the field at the position given and inserts the string `tosend`. Coordinates are 1 based, as listed in the status area of the terminal. Raises: FieldTruncateError if ‘tosend’ is longer than ‘length’.
• Arguments:
ypos (int): y position (row number)
xpos (int): x position (column number)
tosend: the string to insert
length: the length of the field
delete_field():
• Description: Delete contents in field at current cursor location and positions, cursor at beginning of field.
• Arguments: none
save_screen(file_path):
• Description: Save the current screen as a file.
• Arguments:
file_path (string): file path and name